30th Birthday Cake with Ombre Ruffles
Highlighted under: Celebration Feast Ideas
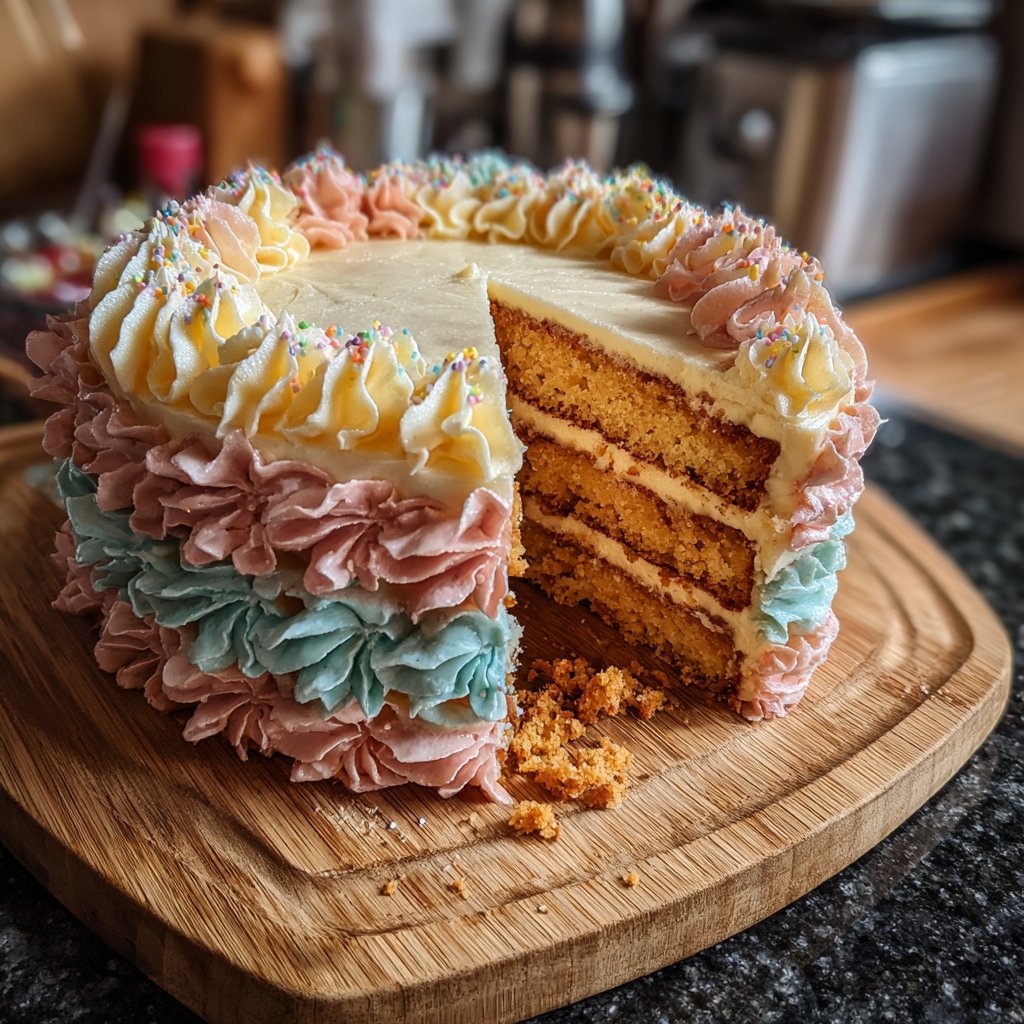
As I celebrated my milestone 30th birthday, I knew I wanted something special, and this 30th Birthday Cake with Ombre Ruffles was the perfect choice. The vibrant layers not only symbolize the journey of my twenties but also add a beautiful touch to the party. Each ruffle is carefully crafted, creating a stunning visual appeal. I also chose a decadent vanilla buttercream to balance the sweetness, making this cake a delightful centerpiece and an unforgettable experience for all my guests.
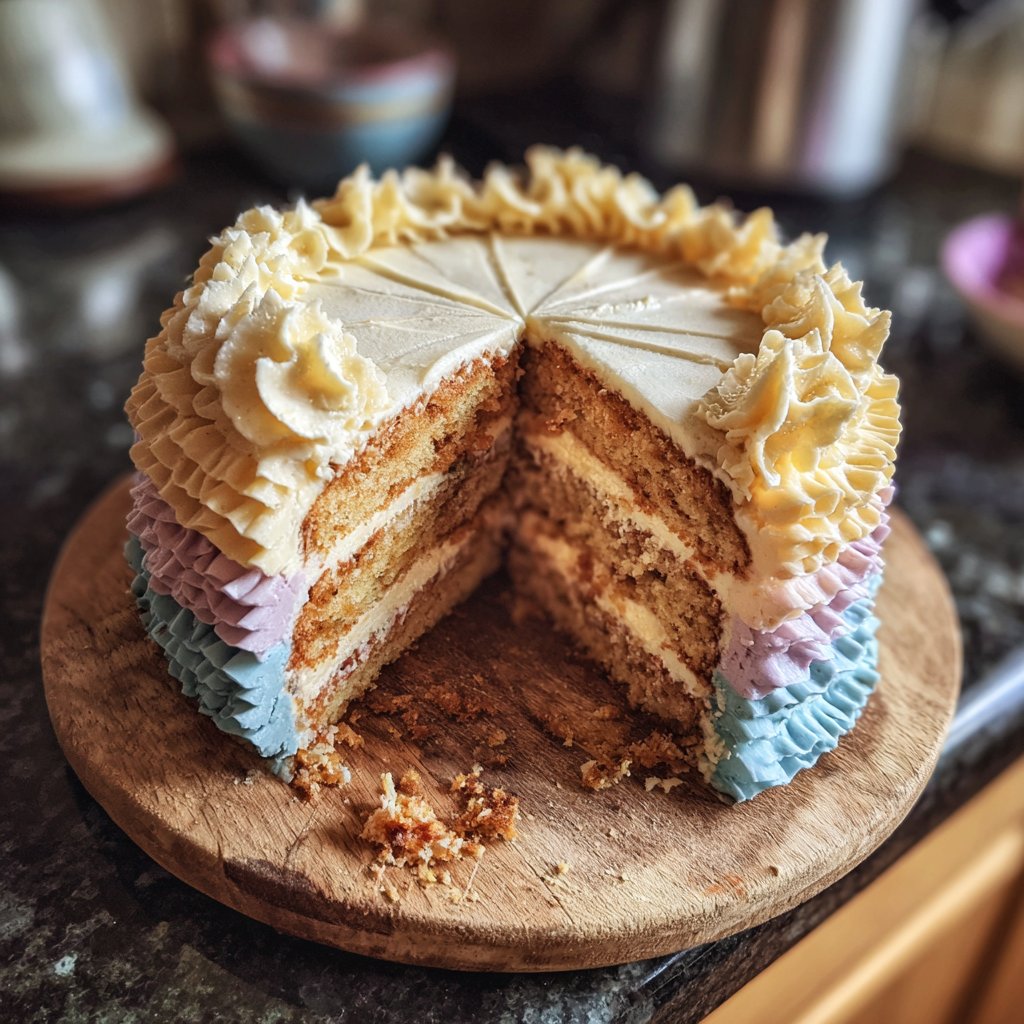
When I embarked on creating this cake, I aimed for a balance of flavor and visual allure. After trial and error, I found that a blend of vanilla and almond extracts in the buttercream provided a rich taste that complemented the cake layers beautifully. To achieve the ombre effect, I gradually added food coloring, ensuring each layer seamlessly blended into the next.
To keep things fun, I experimented with making the ruffles. I discovered that using a piping bag with a petal tip not only gave sharper edges but also added an elegant touch. This cake quickly became the showstopper of my birthday celebration!
Reasons to Love This Cake
- Stunning ombre ruffles that add a sophisticated flair
- Moist layers infused with vanilla and almond flavors
- A delightful mix of textures and sweetness
- Perfectly balanced for a celebratory occasion
Perfecting Your Cake Layers
Each layer of this cake is paramount to achieving the desired texture and flavor. Make sure that your butter is at room temperature, which allows it to incorporate air more effectively during mixing. This step creates a light and fluffy cake. When mixing the batter, avoid overmixing once you add the flour mixture; overmixing can develop gluten, resulting in a denser cake. Stop mixing as soon as no dry ingredients are visible for light, airy layers.
Baking time can vary slightly based on your oven's calibration and the material of your cake pans. As a general guideline, check for doneness at the 30-minute mark. The cakes should be golden brown, and a toothpick should come out clean when inserted into the center. If you notice the tops browning too quickly, you can tent them with aluminum foil to prevent burning while the insides finish baking.
Creating the Buttercream Dream
For the buttercream, the butter should be sufficiently softened but not melted; it should easily hold a shape when whipped. If using cold butter, cut it into small pieces and allow it to sit out for about 30 minutes before starting. Adding the heavy cream creates a silky consistency that's easy to spread and pipe. If your buttercream is too thick, add cream a tablespoon at a time until you reach the desired consistency.
When dividing the buttercream for coloring, consider using gel food coloring instead of liquid. Gel colors provide richer hues without altering the consistency of your buttercream. Mix the colors until fully combined, and test them against your desired ombre shades on parchment paper to ensure they transition smoothly from dark to light as you decorate the cake.
Tips for a Stunning Decoration
Using a piping bag with a petal tip is crucial for creating those beautiful ruffles. To achieve a seamless transition between colors, start piping from the bottom and work your way up, overlapping the ruffles slightly. This technique not only enhances the visual appeal but also helps to create depth. If you're unsure about the technique, practice on parchment first; it’s a great way to perfect your ruffle skills without the pressure of decorating the cake directly.
When it comes to adding edible glitter or fresh flowers, timing is essential. Add these decorations just before serving to maintain their freshness. If using fresh flowers, make sure they are pesticide-free and safe for consumption. Keep in mind that some flowers, like lilies or daffodils, are toxic; stick to options like roses or edible pansies for a beautiful and safe finish.
Ingredients
Gather the following ingredients to make this gorgeous cake:
For the Cake
- 3 cups all-purpose flour
- 2 1/2 cups granulated sugar
- 1 cup unsalted butter, softened
- 1 cup milk
- 5 large eggs
- 1 tablespoon baking powder
- 1 teaspoon vanilla extract
- 1 teaspoon almond extract
- 1/2 teaspoon salt
For the Buttercream
- 1 cup unsalted butter, softened
- 4 cups powdered sugar
- 1/4 cup heavy cream
- 1 teaspoon vanilla extract
- Food coloring (various shades of your choice)
For Decoration
- Edible glitter (optional)
- Fresh flowers (optional)
Ensure you have everything ready before starting the baking process!
Instructions
Here’s how to create this stunning cake:
Prepare the Cake Layers
Preheat your oven to 350°F (175°C). Grease and flour three 9-inch round cake pans. In a large mixer bowl, combine the softened butter and sugar, and beat until light and fluffy. Add the eggs one at a time, beating well after each addition. Mix in the vanilla and almond extracts. In another bowl, whisk together flour, baking powder, and salt. Gradually add dry ingredients to the butter mixture, alternating with milk, until just combined.
Bake the Cakes
Divide the batter evenly between the prepared pans. Bake for 30-35 minutes or until a toothpick comes out clean. Allow cakes to cool in pans for 10 minutes, then transfer to wire racks to cool completely.
Make the Buttercream
In a large bowl, beat the softened butter until creamy. Gradually add powdered sugar, then beat in the heavy cream and vanilla. Adjust the consistency with more cream or sugar as needed. Divide the buttercream into three bowls and color each with different shades of food coloring.
Assemble the Cake
Level the cooled cake layers with a knife. Place one layer on your serving platter, spread a layer of buttercream, and top with the next cake layer. Repeat until all layers are stacked. Apply a thin layer of buttercream around the entire cake to seal in crumbs, then chill for 15 minutes.
Decorate with Ruffles
Using a piping bag fitted with a petal tip, pipe ruffles starting from the bottom of the cake, working your way up, changing colors as necessary. Finish with additional decorations like edible glitter and fresh flowers.
Once decorated, your cake is ready to impress!
Pro Tips
- For smooth cake layers, make sure to let them cool completely before frosting. Use a bench scraper for a sleek finish on the buttercream.
Make-Ahead and Storage
If you'd like to prepare this cake in advance, the layers can be baked and stored separately. Wrap each cooled layer tightly in plastic wrap and refrigerate for up to two days or freeze for up to three months. If freezing, allow them to thaw in the fridge overnight before frosting to prevent condensation from ruining your buttercream's texture. This strategy allows you to enjoy the process of decorating without the pressure of last-minute baking.
The decorated cake can be stored in an airtight container at room temperature for up to three days. However, if your party is more than a couple of days out, I recommend refrigerating the cake to maintain freshness. If refrigerating, allow the cake to come to room temperature before serving to enhance the flavors and soften the buttercream. This way, you can enjoy all the delightful textures of your decadent creation.
Variations to Try
For a fun twist on this classic ombre cake, consider adding flavors to each layer by incorporating pureed fruits or different extracts. A layer of strawberry puree, for example, can pair beautifully with the vanilla and almond extracts, creating a delightful fruity surprise. You can also experiment with chocolate layers for a visually striking contrast; just replace part of the flour with cocoa powder to maintain the balance.
Another variation is to make a smaller version of this cake into a cupcake format. Use the same batter and divide it into cupcake liners, reducing the baking time to 18-20 minutes. You can then pipe the ombre buttercream onto each cupcake, making them easy to serve and enjoy at your birthday celebration while maintaining the stunning visual appeal and flavors of the original cake.
Questions About Recipes
→ Can I use different flavors for the cake?
Absolutely! You can substitute the vanilla extract with any flavor of your choice, such as lemon or chocolate.
→ How do I store the cake?
Store the cake in an airtight container at room temperature for up to 3 days or in the fridge for up to a week.
→ Can I make this cake ahead of time?
Yes, you can bake the layers a day in advance and assemble the cake the day of the event.
→ What if I don't have a petal tip for the ruffles?
You can use a round tip in a pinch, but the ruffles may not be as defined.
30th Birthday Cake with Ombre Ruffles
Created by: The Globalbitesrecipes Team
Recipe Type: Celebration Feast Ideas
Skill Level: Intermediate
Final Quantity: 12 servings
What You'll Need
For the Cake
- 3 cups all-purpose flour
- 2 1/2 cups granulated sugar
- 1 cup unsalted butter, softened
- 1 cup milk
- 5 large eggs
- 1 tablespoon baking powder
- 1 teaspoon vanilla extract
- 1 teaspoon almond extract
- 1/2 teaspoon salt
For the Buttercream
- 1 cup unsalted butter, softened
- 4 cups powdered sugar
- 1/4 cup heavy cream
- 1 teaspoon vanilla extract
- Food coloring (various shades of your choice)
For Decoration
- Edible glitter (optional)
- Fresh flowers (optional)
How-To Steps
Preheat your oven to 350°F (175°C). Grease and flour three 9-inch round cake pans. In a large mixer bowl, combine the softened butter and sugar, and beat until light and fluffy. Add the eggs one at a time, beating well after each addition. Mix in the vanilla and almond extracts. In another bowl, whisk together flour, baking powder, and salt. Gradually add dry ingredients to the butter mixture, alternating with milk, until just combined.
Divide the batter evenly between the prepared pans. Bake for 30-35 minutes or until a toothpick comes out clean. Allow cakes to cool in pans for 10 minutes, then transfer to wire racks to cool completely.
In a large bowl, beat the softened butter until creamy. Gradually add powdered sugar, then beat in the heavy cream and vanilla. Adjust the consistency with more cream or sugar as needed. Divide the buttercream into three bowls and color each with different shades of food coloring.
Level the cooled cake layers with a knife. Place one layer on your serving platter, spread a layer of buttercream, and top with the next cake layer. Repeat until all layers are stacked. Apply a thin layer of buttercream around the entire cake to seal in crumbs, then chill for 15 minutes.
Using a piping bag fitted with a petal tip, pipe ruffles starting from the bottom of the cake, working your way up, changing colors as necessary. Finish with additional decorations like edible glitter and fresh flowers.
Extra Tips
- For smooth cake layers, make sure to let them cool completely before frosting. Use a bench scraper for a sleek finish on the buttercream.
Nutritional Breakdown (Per Serving)
- Calories: 450 kcal
- Total Fat: 20g
- Saturated Fat: 12g
- Cholesterol: 95mg
- Sodium: 160mg
- Total Carbohydrates: 63g
- Dietary Fiber: 1g
- Sugars: 42g
- Protein: 4g